Tuesday, August 31, 2010

Monkey Birthday Cards

I was going through my pattern paper and came across this jungle glitter paper pad I had. Of course, the Changito monkeys (by Stampendous) were the perfect choice for my "jungle" theme. I used Copic markers to color the monkeys (and the tree). You could easily change the sentiments on these cards (but since I am low on birthday cards, so I went with these). I wanted to add some extra dimension to the tree, soI stamped the top part a second time and cut it out. I added dimensional dots to make it "pop" out.

Sunday, August 29, 2010

Chunky Glitter Flower

There is not a lot of stamping involved in this card. I used "white core" textured paper for this card. I embossed it with the flower cuddlebug folder and then sanded over the flower (so the white shows through). The center of the flower is stamped with "Thinking Happpy Thoughts" (Stampin' Up), so you could choose any sentiment for this card. I used chunky glitter from Stampin' Up and a sticker flower gem to add sparkle to this card. The orange daisy ribbon and white core paper are both from Walmart.

Friday, August 27, 2010

If you are what you eat...

Isn't this a cute saying?? This is from the new hostess set "Birthday Bakery" (Stampin' Up). The cake stamp is from the set "How Sweet It Is" by Gina K Stamps. I just happened to have some of this pattern paper (from a huge paper pack). After I stamped the cake I masked over it (with a post it note piece of paper)to stamp the polka dot background "Dot, Dot, Dot" (Stampin' Up). This card will be offered at the Stamp-a-Stack tonight. Thanks for stopping by!

Thursday, August 26, 2010

Dreams really do come true...

This is probably one of my favorite cards now! I love these colors (and this paper)! Unfortunately, it is retired from Stampin' Up (Slumber Party). I happened to find it this spring on the clearance website, so I bought a two more packs (now I wish I had gotten more!). This cardstock is nice and heavy and it is textured. The flowers are from the set "One of a Kind" (Stampin' Up). I used the colors Riding Hood Red and Baja Breeze. The dream sentiment was created on the computer, but this card works with any sentiment. I used the marvy oval punch (pink) and marvy scallop oval punch (purple). On one card I used sticker gems for the centers of the flowers, the other card has button centers (you could also use stickles glitter glue for the centers). This card will be offered at the Stamp-a-Stack tomorrow.

Wednesday, August 25, 2010

Stamp-a-Stack Time

I am going to squeeze one more "stamping" workshop in before I go back to work next week. If you are available and interested it is Friday, August 27 at 5:00 PM. This is one of the cards that will be available Friday night. This cute owl is from "Little Forest Friends" (My Cute Stamps). I found this cute clear set at CHA from the Custom Crops booth. I colored the base of the owl in with a copic marker and the center of the owl is paper pieced on using kraft colored paper. The branch and sentiment are from the same set. The leaves are also paper pieced on using bright green. The clouds are cut from a die from Papertrey Ink. Thanks for checking in.

Sunday, August 22, 2010

Card Class

Well, I am home from a long and well rested vacation in Ludington. It is good to be home, but now it is time to get my home organinzed and my card stuff organized (it has been all packed up from the craft show). It will take me a day or two to get back on track. Plus I need to get back into the classroom and organize that as well. This week will be a little hectic (before I go back to work next week). Allie (my senior) has orientation tomorrow and senior pictures on Tuesday. Tomorrow is also Tori's 20th birthday (dinner out to celebrate). Busy, busy, busy! As promised, I said I would show you the cards I made at the card class at the Scrapbook Nook. It was a nice variety of designs and techniques, something cute, something challenging (the origami) and something using new "mediums" ("rub and buff" to antique the bird cage and beads with jump rings). These cards were very detailed, but most of the work was already done for us, she had all the pieces stamped, die cut and embossed - she even had the little curlers made for us! All we had to do was ink, color and assemble. (I like this kind of class!) The origami crane card was based on a story "Sadako and the Thousand Paper Cranes". Based on the true story of a young Japanese girl who contracts leukemia as a result of the atom bomb that was dropped on Hiroshima, the story follows Sadako as a healthy schoolgirl winning relay races, through her diagnosis with the atom bomb sickness, to her long stay in the hospital. It is in the hospital that she first begins making origami cranes to pass the time. Her ultimate goal is to make 1000, but she dies with only 644 completed. Sadako's classmates finish making the remaining cranes, and all 1000 are buried with her. It was a very touching story. I don't think I would be able to fold another crane - it was a bit difficult! Well, I hope to be creating some new stuff soon! Thanks for stopping by!

Friday, August 20, 2010

Bright Cupcake

We are still in Ludington, enjoying the beautiful summer weather. It is almost time for me to go back to work. There is so much more stamping I want to do! Here is a card I had available for my last "Stamp-a-Stack" workshop. For this card I used the big stamp "Simple Birthday Thanks" (Stampin' Up). It is still available, but it is hard to find in the catalog now. It used to be with the birthday stuff, now it is with the background stamps and it is easy to overlook. I first stamped it on white and made a pattern so I could get the different colors. I thought these bright colors could be used for a boy or girl card. By making a template, I can easily change up these colors. I ran the bottom part of the cupcake through the crimper and the top part is embossed with the swiss dots embossing folder. The cherry is covered with a chunky red glitter from the Martha Stewart collection. The background is made with a big wheel from Stampin' Up (don't forget to get these out - they make an easy coordinating background). The label stamp is from the set "Favorite Things" (label punch and stamp both from Stampin' Up). It has been a week since I have been in my studio, but I did find a card class up here last night taught by one of my creative friends from Manistee. Her cards are beautiful. I will post them as soon as I get home. Thanks for stopping by, next time I post, I will be back home creating in my studio!

Wednesday, August 18, 2010

Birthday Candles

I almost forgot to post this card. I made it earlier this summer after visiting a local scrapbook store in Ludington. I am back in Ludington, and after visiting Scrapbook Nook again, I saw this paper and remembered my card. (Actually, my card was sitting on display by the paper - donated by Connie, I'm sure!). I am not sure that the owner appreciated it or not, she didn't really say . When I told her that was one of my cards, she just said she didn't know how it got there. She did say that people commented on it. I would think that samples of the product would help sell the product, plus the card didn't cost her anything - all products were paid for and someone else made the card! As I walked through the store, I didn't see any display boards, or samples of the products being used (only a few scrapbook pages here and there, but no cards). Seeing samples help give other crafters ideas how to use the product, I think this store owner should consider this! And although she calls it a "scrapbook" store, it might be of benefit to her to also show how these products can be used in cards, too. (But, it's not my store, so ....enough said on this). This paper is from the series called B-day Bash by the company Imaginisce . This paper is double sided and slightly embossed. There are other coordinating papers, plus embellishments and even some stamps. I grabbed a few more sheets of this series of paper (plus the stamp I missed last time). Looking forward to some creating time when I get home.

Tuesday, August 17, 2010

Recipe Notebooks

Here are a few recipe books/journals that I made for the craft shows. I used paper from Close To My Heart called "Cherry - O". (I won a $20 gift certificate from Close To My Heart at the Novi convention!) I just love this paper (love the cherries and the red, blue, pink and green together) and thought it would be good for the covers of these recipe books. I used regular composition notebooks and covered them with the paper. I used my Cricut (Cuttin Up cartridge) to make the title of the book. The sticker embellishments are also from Close to my Heart. The clips on two of the books are from Michaels (I added some of the cardstock stickers on the clips to match the paper). I finished the books by adding some ribbon around the spine of the book.

Monday, August 16, 2010

Calendar/Planner

On vacation in beautiful Ludington after a two day craft show. The weather was great. It was nice seeing people who look for me every year. (Like Sandy! Nice to meet you and thanks for following my blog!) Now it is time for me to relax a little before going back to school, and do a little online shopping to replenish some supplies! I am not sure if I can go a whole week without stamping and creating!! Don't worry though, I have some projects saved up to show you this week. So here I have something I made for school (see, I do think about school once in a while!) I found this black calendar/planner at Target and loved the inside decorations (classic black and white flowers). I used white rub ons from Stampin' Up to decorate the outside. I added some clips (because you never know when you will have loose papers or memos to attach and keep track of). Very simple and yet fun to look at (which is important!) Well, off to enjoy my coffee and the beautiful weather. Thanks for stopping by!

Friday, August 13, 2010

Yeah! I Won from Custom Crops!

I entered a "blog" picture contest a few weeks ago throught CustomCrops.com and my blog was chosen as one of the winners! I won $100 shopping spree! Can't wait to show you what I got (coming soon!) Well, I am getting ready to head up north to Ludington for a two day craft show. It looks like the weather may hold out, so I am crossing my fingers. Here are a few cards I have been working on. I realized I didn't have any "cat" or "dog" cards, so I got out my cricut to create (Doodle Charms cartriddge). The paper for each was just in my "stash". Ribbon is from Hobby Lobby. These cards are pretty straight forward, just some cutting and glueing! Thanks for looking!

Wednesday, August 11, 2010

Coffee Gift Cards

Aren't these the cutest ever! I just love these! This is a "take" on Taylored Expressions coffee "book" that I saw at CHA. When we were looking at it, we got the idea that it would be cute as a gift card holder, so off to Starbucks! The base is a coffee cup "holder" (is that what you call those things that protect your hand from hot coffee???) Well, whatever they are called, I ripped it apart, turned it inside out and re-glued it together. I stapled the bottem with the Tim Holtz mini stapler (if you don't have that, it is a must to have - love it!). Then let the decorating begin! For the pink ones, I used the new die label from Taylored Expressions, for the red ones (the top two) I used a set called "A Little Caffine" by Just Right stamps (and I used circle punches for those) and for the bottom red, I just used a tag for the front. I used many different coffee stamps (cups are Stampin' Up, the sentiments are from Morning Star stamps and The Artful Stamper). The striped background was made from using the set "It's Official" (Papertrey Ink). Other backgrounds were made with embossing folders (Swiss dot), and the pattern paper is from Cosmo Cricket. Thanks for stopping by, I am off to Starbuck's!

Monday, August 9, 2010

Life is better in flip flops!

Look, Sherry, I used it! "It" as in the new glitter embossing powder we found at CHA from "Sparkle N Sprinkle". We agreed we weren't going to buy things that would sit in a drawer or on a shelf (we have done that before!) I was wondering if this was going to be one of those "buys", but I like how this photo album turned out. I used a self adhesive sticker paper (also bought at Sparkle N Sprinkle). The embossing glitter is easy to use with this paper. We both bought the colors "pool side" and "hit the beach". I had these flip flop felt stickers (from Joann Fabrics). They went perfect with the beach theme. The sun was cut from my Cricut (Doodle Charms cartridge). To finish the album, I tied ribbon pieces at the top. The sentiment is from Morning Star stamps (I found at the Novi stamping convention). Thanks for stopping by!

Sunday, August 8, 2010

Art in the Park

Hello out there in "blog land"! I just got back from a very successful craft show. I often wonder if it is worth the work (not making the cards and projects, because I love that part, but all the packing, loading, unpacking, setting up, repacking, reloading, unpacking at home.... do you get the picture!!) It is exhausting! But then I go and have a very successful day and I think it might be worth it. I actually "out sold" the booths around me this time (I didn't notice, but they both said what a good day I was having, while theirs was just ok.) Unfortunately, you never know what people are going to be looking for, it could have easily been the other way around for me. The best part of any show for me is watching people look at my "stuff". I find it very interesting to see what it is they like (or don't like). And of course, I enjoy the compliments, but mostly I just like to watch them look at everything. Everyone is fascinated with my paperbag albums, they pick them up, study them, but this time, they didn't sell well (where as last month I sold quite a few at a very small show - go figure!) 
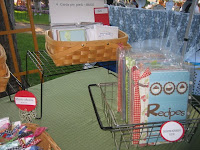
After I was all set up for the show, I moved my car and when I came back, I noticed my tent or booth did not have very good "curb appeal". Those of you who know me, know that's not like me - I am all about presentation and how it looks! I think I need to make some changes. It is hard to see in the pictures. Actually, I think the pictures are even worse than I thought originally! I am not sure what I am going to do differently, but maybe start with my table clothes and layer them. I noticed other booths do that. (You can get the best ideas from other crafters, that is where to get new information - you learn tricks of the trade from people around you - everyone shares where they get things, how to set up, etc. - crafters are very kind people!) My baskets are very "hodge podge", but it is hard to find something to display my cards and projects in and I don't want to have to start all over with that. I am always on the look out for ways to display them. I just can't find anything that looks good with all the different sizes. Plus, the baskets are very hard to travel with. They don't stack very well. Anyone out there in "blog land" with ideas, please let me know. OK, I have babbled on long enough. Time to enjoy my coffee and think about replenishing a few things for next weekend's craft show (a two day show). Did I mention that a craft show consumes a whole week before the show with preparations....! Well, it is a rainy day so off to my studio for some creative time!

Saturday, August 7, 2010

Paper Crafts

Sherry and I had the opportunity to meet one of the editors of Paper Craft magazines at CHA (my favorite magazines ever!). They had a great deal on three of their new magazines, so of course we had to scoop up this deal and I am so glad we did. These magazines are great! I got to enjoy them this week (sitting by the pool). Here is a card idea I got from the "Go to Sketches". This magazine gave the sketch and different ways to use it. This was my version of the "pull out tag" sketch. I took two pieces of card stock cut at 4x4, stitched all the way around the squares and then cut the stitched piece in half diagonally (which gave me two card pockets). I punched a large scallop circle from red and the inner circle from some old "lined school paper". Then added a ribbon at the top for the pull-out tag. Quick card.

Thursday, August 5, 2010

Frog Fun

Here are some more fun stamps I found from CHA from one of my favorite stamp companies - Endless Creations, you may have noticed I use their stamps a lot on my blog. I kept looking at this frog (the flies and the sentiment), I almost walk out without these stamps (another impulse buy!) This card is a version of a "make and take" project they had at their booth (but we didn't have time to make it!). I actually made the circle card and the inner circles on my Cricut using the Wild Card cartridge. I also used something else we found at CHA, Embellie Gellie and "the best glue ever!". I found these at Taylored Expressions, but I saw this at other booths as well (www.scraperfect.com). These tools made it easier to attach these little "googlie eyes". I will show more pictures of how to use this sticky stick and glue later. And what a perfect card to also use my "flower frog" with (my vintage find from the resale shop)! Thanks for stopping by!

Wednesday, August 4, 2010

Soaring by to say Hi!

Here is another Papertrey Ink "find" from CHA convention. (Remember, I spent most of my time and money in this booth!). The one thing I absolutely love about this company is that the stamp sets have matching sayings. I think that Stampin' Up is lacking in this area a bit. It is always nice to have a little fun saying to match the images. Another thing about this company, their prices are very reasonable. This clear set was only $5 and included seven stamps. Again, I used more cloud paper (but when I run out, that's ok, I bought the cloud die cut from Papertrey for only $5!) This set also came with a little banner to pull behind the plane. (Now that I look back at this and wonder why I didn't use that to put the saying inside is a mystery to me!) Next time! Well, it's a cloudy day in Michigan (and extremely humid!) - a good day to be stamping! I see a whole pile of stuff from CHA waiting for me. I haven't even touched the Taylored Expression pile! P.S Sherry, isn't it funny, I went with this huge list from Papertrey and the first set I play with is the plane set (that wasn't even on my list!), I'm glad I bought it!

Tuesday, August 3, 2010

Here to give you a "lift"!

Here are a few cards I made using the set Everyday Button Bits (Papertrey Ink). The buttons are also from Papertrey. Aren't the little bear faces cute? I can't remember the name of the pattern paper (I found it at a small scrapbooking store and knew I would use it for something). The teal ribbon is from Papertrey and the gingham ribbon is from Hobby Lobby.

Monday, August 2, 2010

Had a great time with CustomCrops.com at the 2010 CHA Super Show!

This was the cutest idea ever! This will be a great picture for scrapbooking! It was fun to shop these booths that are only online ordering. I love being able to see and touch the "stuff". Custom Crops by far had the best prices on Cricut cartridges plus a good selection of them. They also had the best price on embossing folders! Just love it when you find these deals.

Sunday, August 1, 2010

CHA Chicago

Well, we are back from Chicago and I don't know where to begin! I bought so many new things and can't wait to get creating. We had so much fun ("we" as in Teresa, Kim, Sherry and me in the picture)! We shopped, we laughed and we shopped and shopped some more! We were there for two days from beginning to (almost) the end (we left an hour before the show closed). There were a lot of great booths for shopping and tons of make and takes (almost all were free!). The make and takes included everything from cards and notebooks and paper crafts to tee shirts and jewelry! We hit many of the make and takes, but there just wasn't enough time (we had to shop!) I would have to say my favorite booth was Papertrey (obviously, that is where I spent the most money!) Here we are with our cute Papertrey bags. This booth was total class, quality products, great packaging...they don't skimp here. I am not even going to say how many times I went back to this booth to make purchases! Well, I will share projects and more pictures of our trip later, I am off to play with some of my new toys!

Create from a Kit

  I'm always on the look out for these kind of cards.  They are so easy to create from.  By using a few tools and supplies from your sta...